As you might have seen, Brigitte Heitland, the person behind “Zen Chic”, published her first book with Martingale.
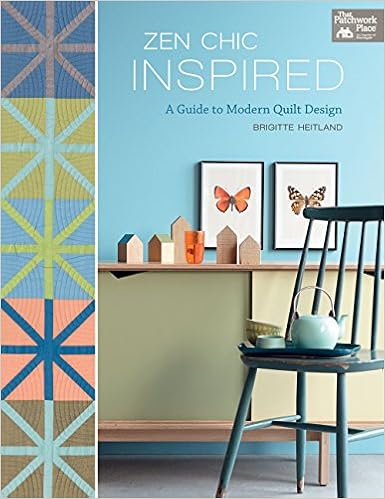
the book
In “Zen Chic Inspired” she describes her approach to designing quilts that really match one’s peronal style. She begins by questioning if you ever bought fabric that you loved when it was on display at your LQS but at home you realise that it looks less appealing and strangely out of place?! Yes. Me. Guilty.
She then shows how to design quilts that match your living space: your flat, your house, your mobile home. She starts from a photograph of a room and deducts shapes and colours from it.
the challenge
When she wrote the book, several members of our Modern Quilt Guild Bielefeld, helped her sewing the quilt tops (yes, me too). Brigitte threw a party when she received the first copies of the book and we had a blast sketching quilt designs based on random photographs that evening. We decided to carry it a bit further and to make a little MQGB challenge – just for fun. Brigitte chose a picture and we were to make a matching quilt, mini quilt, table runner, wall hanging, etc. based on it.

photo by Houseology Interiors, flickr
fabrics and colours
In her book Brigitte shows different ways to deduct colours from a photo. I tried Moda’s Palette Builder: but seeing that I was on a short timeline (no time for ordering and waiting for shipping of chosen fabrics) I pulled solid fabrics from my stash instead:
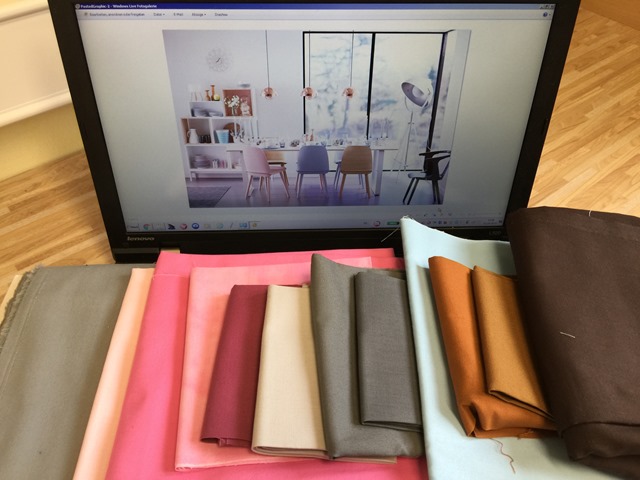
design
Next up was shapes and design. I liked the shapes of the lampshades but as there is similar quilt in Brigitte’s book I thought it might be too simple to just copy her quilt. I still wonder how it happend that I chose the wall clock instead.
Here’s a close up of the clock:
And these were my first thougts for a possible design:
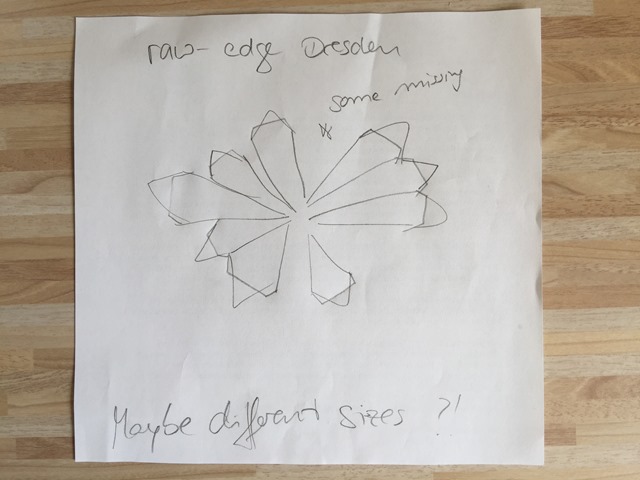
I never made a dresden plate before so this was entirely new to me. I thought of differnt sizes for the wedges and of using negative space between them.
work in progress
I found a tutorial “how to make your own dresden plate template” here and just followed the instructions. Easy peasy. I can recommend this tutorial, if you ever want to make dresden plate templates in your exact size.
Once done with sewing the wedges together (I skipped the wonky idea and made a “traditional” dresden plate), I wondered how to achieve that translucent look of the wall clock. I opted for a second layer, more fragile and quite thin. I made another template and drew the design directy onto the paper side of a fusible web.

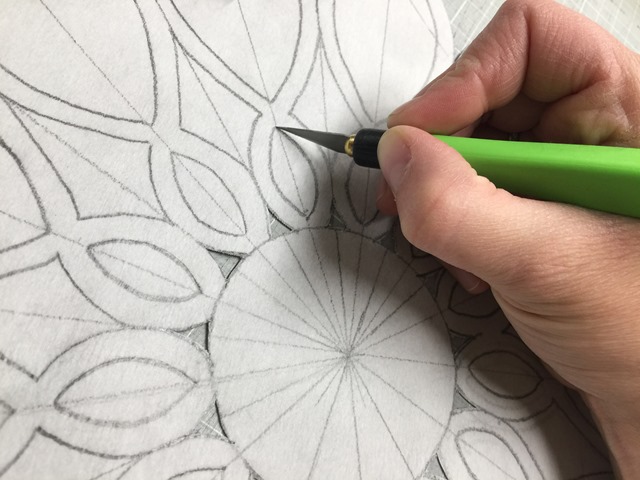
The next step was tedious. I ironed the fusible web onto a light grey fabric and had to cut out all the shapes with an exacto-knife.
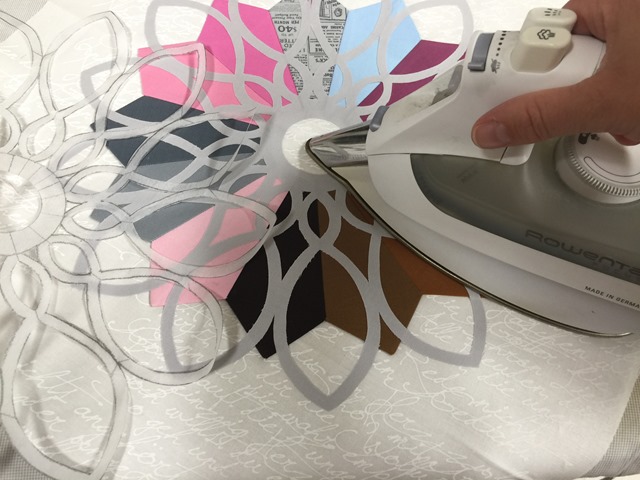
The dresden plate was ironed onto the background fabric and the second layer was ironed onto the dresden plate:
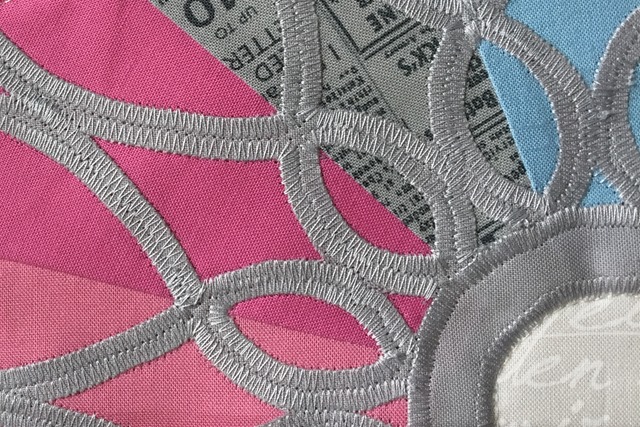
I appliquéd the second layer with my sewing machine, using a wide and dense zig zag stitch in a similar light grey aurifil thread. Thereby I attached two layers in one step. Here is close up shot:
I kept the quilting fairly simple and just stitched some straigt lines “radiating” from the tips of the wedges, using a white aurifil thread.
the result
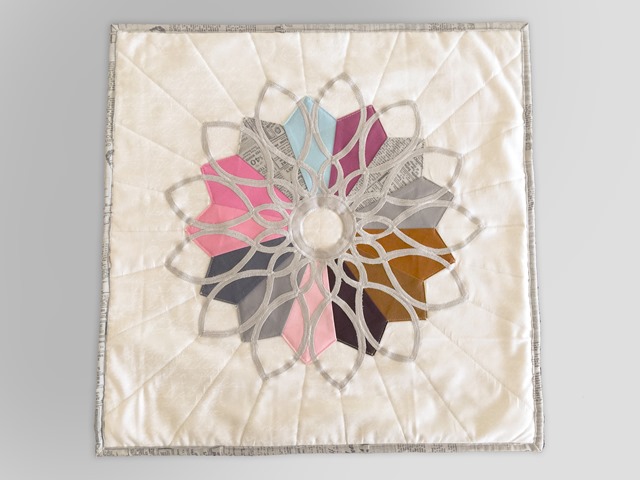
The binding is made of the same newspaper print (from Brigitte’s Modern Background fabric line) that I used to break up the solids-only-look of the dresden plate.
I added a zipper and an extra backing at the back so this mini quilt can double up as a pillow cover.

Here’s a photoshop image, showing how the mini quilt might look as a wall hanging in the original room:

summary
This challenge was a greate experience for me. If you look at the quilts I made during the last years you will discover that I rarely follow quilt patterns. I love to make up my own designs. This book helps me to get better at choosing fabrics and designs matching the surroundings/ person the quilt is intended for. When I plan to sew a quilt for my sister next, I’ll snap a photo of her home first. Of course I know her living room, but do I really remember the hues of green she used for decorations? No. And I might not have noticed the unique shape of that armchair leg that I could use as a shape in my quilt design.
So if YOU like to design your own quilts, this book is for you. And if YOU have always be terrified by the thought of designing your own quilt, this book is for you, too! I takes you step by step through the design process and includes 12 patterns, deducted from 12 different photos of 12 living spaces.
If you’d like your own book, Brigitte offers signed copies here.
giveaway
As a bonus for those who read through this lengthy post, I will give away one copy of “Zen Chic Inspired” AND the mini quilt I made. Just leave me a comment below, telling me if you prefer to design your own quilts or if you rather follow quilt patterns (there are so many lovely ones out there!).
This giveaway is open until midnight, May 29th, CEST. I will draw a random winner on May 30th.
Happy sewing everyone!
Christine
P.S. If you’d like to see who else participated in the challenge and what they designed for the same room, click here and here.
P.P.S. Yes, Brigitte is my friend but yes, these thoughts are my thoughts and I really like the book. And no, I don’t get paid for writing a review and yes, I really bought this book to give it away to you.

